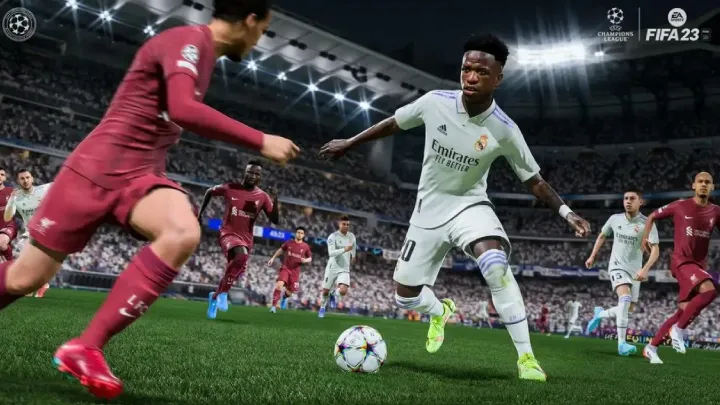
FIFA 23 stands as a landmark title, closing out the iconic franchise with a game engine and feature set that demanded precision, strategic depth, and constant adaptation. The introduction of the Power Shot, refined gameplay physics (HyperMotion 2.0), and a completely revamped Ultimate Team (FUT) Chemistry system fundamentally altered how players approached the game. Whether your aim is to climb the ranks in FUT Champions, build a dynasty in Career Mode, or simply master the controls, true success in FIFA 23 requires a holistic understanding of its mechanics. This guide serves as a comprehensive "How To" manual, structured by the phases of the game, from initial setup to high-level meta exploitation. Mastery is not about spamming one tactic; it’s about having a deep arsenal of skills, which this guide will fully equip you with.
 1. Initial Setup: Optimizing Your Controls and Camera (The Foundational Phase)
Before touching the pitch, your settings must be configured for competitive advantage. The default options in FIFA 23 are designed for casual play and often involve too much $\text{A}I$ assistance, masking true skill and hindering high-level execution.
Controller Calibration: Enabling Competitive Play
The single most critical step is to disable or reduce $\text{A}I$ assistance to gain full control over passing, shooting, and defense.
- Competitive Master Switch: ON. This is mandatory for Division Rivals and FUT Champions, but it’s best to practice with it always on. It removes certain assists (like $\text{A}I$ auto-clearance and automated through balls) and forces manual input, which is the only way to gain pixel-perfect control over the ball.
- Pass and Shot Assistance: Semi-Assisted. Set Through Ball Assistance to Semi or Manual. Semi-assisted controls still allow for player power input, meaning the harder you press the button, the faster the pass, but the $\text{A}I$ will help with direction. Setting it to Manual gives you total control, which is the ceiling for the highest level of play.
- Defending: Tactical Defending. Do not use Legacy Defending. Tactical Defending requires manual input for standing and sliding tackles, forcing you to learn proper jockeying and tackling timing.
Selecting the Tactical Advantage with Camera Angles
Your camera view directly dictates your field of vision, which is crucial for spotting runs and passing lanes.
- Tele Broadcast (The Meta Choice): This camera provides the best balance of pitch width and player size.
- Camera Height: $\mathbf{20}$. This gives the maximum vertical height, allowing you to see more of the pitch.
- Camera Zoom: $\mathbf{0}$. This provides the widest lateral view.
- Co-op: An alternative for players who prefer to see the entire pitch at all times. While the view is wider, the players appear smaller, which can complicate close-control dribbling. Test both options extensively in offline modes.
2. Defensive Mastery: Perfecting Positioning and Containment (Phase Two: The Core Skill)
Defense in FIFA 23 was a patient, manual exercise. Reckless tackling is punished with open space, demanding that players master the art of containment.
The Art of Manual Jockeying and Containment
Jockeying ($\text{L2}/\text{LT}$) is the most vital defensive mechanic. It squares up your player, significantly improving tackle accuracy and interception chances.
- Standard Jockey: ($\text{L2}/\text{LT}$ alone) Use this when an attacker is directly running at you. The goal is to match their speed and reduce the shooting/passing angle.
- Speed Jockey: ($\text{L2}/\text{LT} + \text{R2}/\text{RT}$) Use this when tracking a fast attacker over a greater distance (e.g., a winger down the touchline). It keeps your defensive stance while covering ground quickly.
- Feinting the Tackle: Don't commit to a standing tackle ($\text{Circle}/\text{B}$) until you are shoulder-to-shoulder with the opponent or they have just taken a heavy touch. The moment they enter your tackling range, use the tackle to dispossess them. Missing a tackle leaves you helpless.
Using the Second Man Press Wisely (Team Press)
Calling in a second defender to press ($\text{R1}/\text{RB}$) can be an effective trap but is inherently risky.
- When to Use It: Primarily in the midfield or on the flanks to create a 2-on-1 overload and force a turnover. It is highly effective when the opponent is passing the ball around their back line.
- When to Avoid It: Never use it in your penalty box or when your opponent is running through the middle. It pulls an $\text{A}I$ defender out of position, opening up a clear passing lane into your box. Instead, manually control your central defensive midfielder ($\text{CDM}$) to cut the central lanes.
3. Attacking Fundamentals: Precision Passing and Directed Runs (Phase Three: Creation)
The key to scoring is not speed alone, but intelligent movement and perfectly weighted passes. FIFA 23 rewarded players who mastered the control of their off-ball runners.
Advanced Passing Techniques
Moving beyond the simple $\text{X}/\text{A}$ pass allows you to break lines and find runners in complex defensive setups.
- Driven Pass ($\text{R1}/\text{RB} + \text{X}/\text{A}$): A low, fast pass that is difficult for $\text{A}I$ legs to intercept. Use this to quickly switch the play or to fire a pass into a forward’s feet when under pressure.
- Whipped Cross ($\text{R1}/\text{RB} + \text{Square}/\text{X}$): A low-trajectory, fast cross into the box. This was particularly effective in FIFA 23 for setting up tap-ins or powerful headers before the goalkeeper could react.
- Controlled Through Ball ($\text{R1}/\text{RB} + \text{Triangle}/\text{Y}$): A lofted through ball that gives the runner more space to run onto. Ideal for bypassing the defensive line when the defenders are playing a high line (high $\text{Depth}$).
Directing Player Runs
Creating space for yourself often means moving your teammates into position manually.
- Triggering Runs ($\text{L1}/\text{LB}$): Tap $\text{L1}/\text{LB}$ and point the $\text{R}$ stick in the direction of the teammate you want to make a forward run. This is essential for initiating a pass-and-move sequence and stretching the defense.
- Calling Players Short ($\text{R1}/\text{RB}$): Tap $\text{R1}/\text{RB}$ to have a nearby teammate check back toward the ball. Use this when the midfield is congested to create a safe passing option and restart the build-up.
- Player Lock ($\text{L3} + \text{R3}$): Press both sticks to activate Player Lock. This lets you pass the ball and immediately take control of the receiver's movement, sending them on a strategic run.
 4. Goal Scoring Arsenal: The Meta Shots and Finishing (Phase Four: Execution)
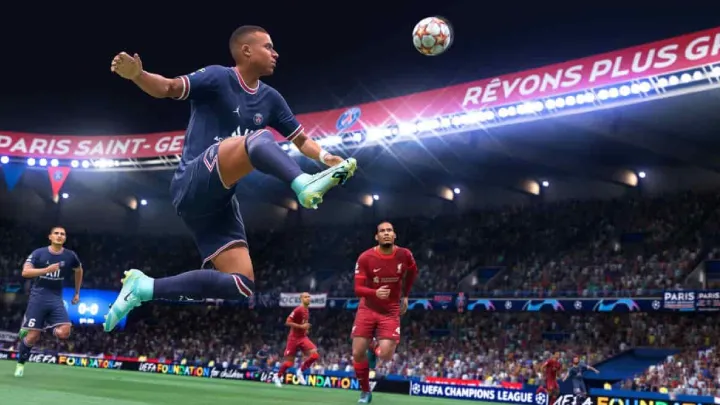
The effectiveness of shooting shifted dramatically in FIFA 23 due to the introduction of new mechanics. High-level players relied on a mix of precision and power.
The Power Shot Mechanic
The Power Shot (holding $\text{L1}/\text{LB} + \text{R1}/\text{RB}$ and then $\text{Circle}/\text{B}$) was the game's most powerful, direct shooting option.
- High Risk, High Reward: The long wind-up animation gives the defender time to block, and its aiming sensitivity is higher.
- Best Use Cases:
- From distance (outside the box): When an opponent is trying to "park the bus" and has committed few players forward.
- After a quick turn or cutback: When the goalkeeper is off-balance or the defender is out of position.
- The Green Time Advantage: To guarantee the shot is on target and maximize power, you must "green time" the finish by pressing the shoot button a second time at the precise moment the player’s boot makes contact with the ball.
The Finesse and Trivela Finishing
These two shots were crucial for consistent scoring due to their curved trajectory.
- Finesse Shot ($\text{R1}/\text{RB} + \text{Circle}/\text{B}$): Ideal when shooting from a diagonal angle to bend the ball around the keeper into the far corner. Players with the Finesse Shot Trait were incredibly potent with this.
- Trivela Shot (Outside Foot) ($\text{L2}/\text{LT} + \text{Circle}/\text{B}$): The dominant long-shot meta. This was highly effective when shooting with a player on their strong foot from the wrong side of the goal (e.g., a right-footed player shooting from the left wing). The Trivela's curve was often impossible for the $\text{A}I$ goalkeeper to save.
5. Dribbling and Skill Moves: Creating Space in Tight Areas (Phase Five: 1v1 Dominance)
Dribbling in FIFA 23 was about efficiency and momentum conservation, making simple, high-impact moves far better than flashy, slow tricks.
Close Control and Momentum Dribbling
- Controlled Dribbling ($\text{L1}/\text{LB}$): Keeps the ball extremely close to your feet. Use this inside the box or when turning under pressure.
- R1/RB Dribbling (The "Strafe Dribble"): Use this with the $\text{L}$ stick to make small, sharp, controlled touches. It’s excellent for drawing defenders in and quickly accelerating away. It also shields the ball effectively.
The FIFA 23 chemistry system was a radical departure, simplifying links but making it essential to hit the maximum (3 Chemistry Points) on every player for maximum stat boosts.
Maximizing Chemistry (The 3-Star System)
A player earns Chemistry Points (up to three) from having enough links through their Club, Nation, and League connections in the starting XI.
- Minimum Thresholds: You need $\mathbf{2}$ players from the same club, $\mathbf{3}$ from the same nation, or $\mathbf{3}$ from the same league to start linking.
- The "Hybrid" Strategy: The most effective early-game approach is to focus on a two-league hybrid using players from a single, popular nation (like France, Brazil, or Netherlands) to link the leagues together.
- Example: Use French players from the Premier League and the Bundesliga, as the French nationality provides the necessary mutual links between the two leagues.
Chemistry Styles: The Stat Boosts
Chemistry Styles are non-negotiable, as they provide massive in-game stat boosts when a player is on maximum chemistry.
- Attackers: Use Hunter (Pace and Shooting) or Deadeye (Shooting and Passing).
- Midfielders: Use Shadow (Pace and Defending) for defensive midfielders ($\text{CDM}$); Catalyst (Pace and Passing) for attacking midfielders ($\text{CAM}$).
- Defenders: Use Shadow (Pace and Defending). This is the single most important Chemistry Style for center-backs and full-backs.
7. Ultimate Team Economics: Trading and Coin Generation (Phase Seven: Financial Planning)
Coins are the currency of success in FUT. You must supplement match earnings with smart trading and objective completion.
Low-Risk Trading Methods
Avoid risky investing early on. Focus on high-volume, low-margin methods.
- Sniping Consumables: Search the transfer market for high-demand consumables (like Shadow and Hunter Chemistry Styles) at prices lower than their market average. Buy them instantly ("sniping") and relist for a small profit.
- Squad Building Challenge ($\text{SBC}$) Fodder: High-rated (84-88 $\text{OVR}$) players are always needed for repeatable $\text{SBCs}$. Monitor their prices. When a new desirable $\text{SBC}$ drops, buy the necessary players before their price spikes, and sell during the rush.
Objectives and Rewards Strategy
Prioritize game modes that offer high-value, guaranteed rewards.
- FUT Champions (Weekend League): The highest-value rewards, including player picks and large coin bundles. Aim for the 11 Wins tier, which offers a great balance of time commitment and reward quality.
- Squad Battles: An excellent source of reliable weekly rewards (packs and coins) without the pressure of online play. Play on a difficulty that guarantees Gold 1 or Elite 3 ranking for solid pack rewards.
 8. Career Mode: Scouting, Growth, and Team Management (Phase Eight: Dynasty Building)
The success of your Career Mode save hinges on long-term strategy, identifying talent, and utilizing the new Player Personality and Training features.
Youth Academy and Scouting
The Youth Academy is your most valuable asset.
- Scout Priority: Spend the majority of your budget on scouts with high Experience and Judgment.
- Instructions: Send scouts to countries like Brazil, Argentina, Portugal, and France with the instruction to look for "Technically Gifted" or "Physically Strong" players.
- Youth Player Development: Once a player is in your academy, monitor their Potential ($\text{POT}$). Only promote players with "Showing Great Potential" (80-85 POT), "Exciting Prospect" (86-90 POT), or "Potential to be Special" (91+ POT) to the senior squad.
Training Plans and Player Development
FIFA 23 allowed for customizable training plans to accelerate specific attribute growth.
- Position Change: Use the Develop Player tab to change a player's primary position to fit a tactical need (e.g., changing a $\text{CAM}$ with high defensive stats to a $\text{CM}$ or even a $\text{CDM}$).
- Training Plans: Assign a specialized training plan to focus on the attributes you want to grow (e.g., set a young center-back to a Ball-Playing Defender plan to boost their passing).
9. Custom Tactics: The Meta Formations and Instructions (Phase Nine: Tactical Edge)
Your formation and custom tactics are the blueprint for your team's on-pitch movement. High-level play requires several preset tactics to adapt to different match situations.
The Most Effective Meta Formations
These formations were the most popular and balanced in FIFA 23’s competitive scene.
- 4-2-3-1 (Narrow): The most balanced defensive formation. The two $\text{CDMs}$ provide a strong defensive shield, while the central $\text{CAM}$ links the defense and attack.
- 4-4-2 (Balanced): Excellent for pressing and creating wide overloads. Easy to defend with.
- 4-2-2-2 (Aggressive): A more attacking option with two central $\text{CAMs}$ (who often behave like false wingers) and two strikers, designed for quick, short-passing football.
Crucial Player Instructions
Setting up specific player roles ensures tactical discipline.
- Strikers (ST): Stay Central and Get in Behind to keep them positioned centrally and to look for through balls.
- Defensive Midfielders (CDMs): Set one $\text{CDM}$ to Stay Back While Attacking and Cover Center to protect the defense. The second $\text{CDM}$ can be set to Balanced or Get Forward for offensive support.
- Fullbacks (LBs/RBs): For a defensive setup, set both to Stay Back While Attacking. For an attacking style, set one to Balanced (or Join the Attack) to overlap.
10. Advanced Techniques: Mindset and Meta Exploitation (Phase Ten: Competitive Mind)
The final step to mastery is adopting the right mindset, controlling your emotions, and continuously learning the game's evolving meta.
The Competitive Mindset (Controlling Tilt)
"Tilt" (frustration leading to poor decisions) is the biggest enemy in FIFA.
- The Two-Loss Rule: If you lose two consecutive games in Division Rivals or FUT Champions, stop playing immediately. Take a 15-minute break, reset your focus, and return later. Pushing through tilt guarantees more losses.
- Practice Makes Perfect: Use the Skill Games to practice specific techniques like the Power Shot, specific skill moves, and green timing, transforming them from luck-based attempts into muscle memory.
Learning the Meta and Adapting
The FIFA 23 meta was defined by exploiting the game's physics and $\text{A}I}$ tendencies.
- The 71 Depth Defense: As mentioned, setting your defensive Depth to 71 in Custom Tactics was the single most dominant defensive meta, as it automatically triggered a highly aggressive and compact defensive line, forcing the opponent into tight areas.
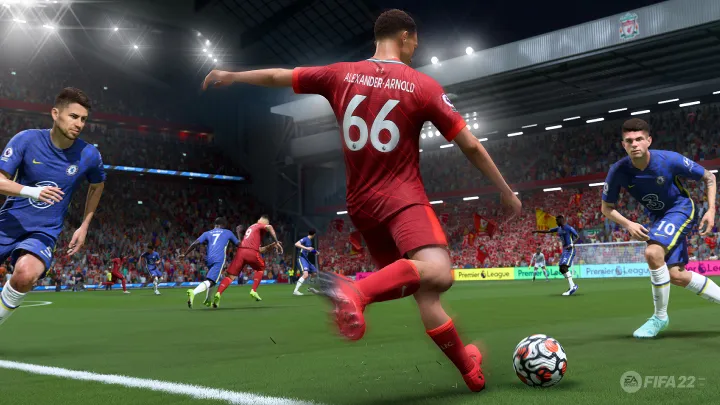
- The Cutback Goal: The Cutback (a pass from the sideline back toward the penalty spot) was highly effective due to $\text{A}I$ goalkeeper positioning. Force your play wide, dribble past the fullback, and cut the ball back to an attacker for an easy tap-in. Mastering this move is essential for winning consistently.
- Post-Patch Adaptation: Always watch professional players and high-level content creators after a major title update or patch. Patches often rebalance shooting, passing, or defending, and adapting early is the key to maintaining a competitive edge.
Mastering FIFA 23 requires optimal settings, disciplined manual defending (jockeying, $\text{71}$ Depth), diverse attacking (Power Shot, Trivela, directed runs), shrewd FUT finance (Hunter/Shadow styles, $\text{SBC}$ trading), and a focus on high-potential Career Mode scouting, all underpinned by a controlled, adaptable competitive mindset.


